|
|
|
|
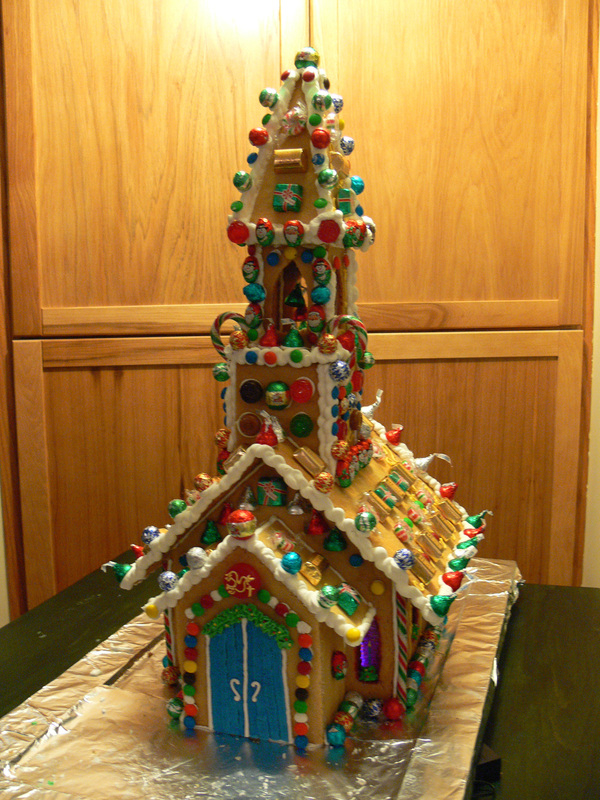
Gingerbread Church
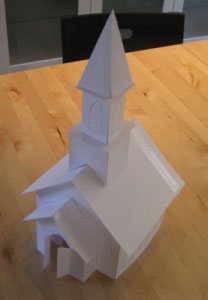
Just over a week after my last gingerbread creation, here I go again. This time I'm going to attempt a different pattern - a church.
You'd think after doing my last house that I'd be very confident. Well, not so, not so. I purchased this pattern from a very reputable website, only to find that the pattern is very, very wrong. The owner had apologised and sent an updated version, but even that was wrong. I finally had to pull the PDF into Photoshop, save it as a Photoshop, place it in Illustrator, and try to repair the pattern. Angles didn't match, sizes were wrong, etc. I won't say which website because that wouldn't be fair to the owner - I will send her my repaired file and ask if she'd like to use it. If she declines, or the conversation goes nowhere, then I'll definitely name the website. (To save people from purchasing a faulty pattern). I'm going to make this for a close family friend with 8 children. We always buy her a candy house, but last year was the last Mrs. Broad was going to make them, so I'm taking up the tradition. Of course, mine will be different - more of a gingerbread house that a traditional candy house. And mine will be lit! |
|
Materials
6 1/2 batches of sugar dough
5 batches of royal icing (so far)
- 2 batches = assembling the house and very basic decorations
- 1 batch = separating and colouring icing accents
- 2 batches = borders and gluing on candies
5 batches of royal icing (so far)
- 2 batches = assembling the house and very basic decorations
- 1 batch = separating and colouring icing accents
- 2 batches = borders and gluing on candies
My Schedule
I like keeping a schedule so that I can go back and read my pages later, remember how many days were needed, etc.
Dec 18 - Mixed the dough and put it in the fridge (1 1/2 hours)
Dec 19 - Tried to figure out the photocopying / enlarging.
Dec 20 - Baked the pieces (4 hours)
Dec 21 - Assembled the steeples (20 minutes), then assembled the walls / structure (4 hours)
Dec 22 - Decorating. 3 hours for the basics. 4 1/2 hours once my two nieces arrived (8 and 10 years old... the gingerbread house took on a decidedly different look after that... LOL!)
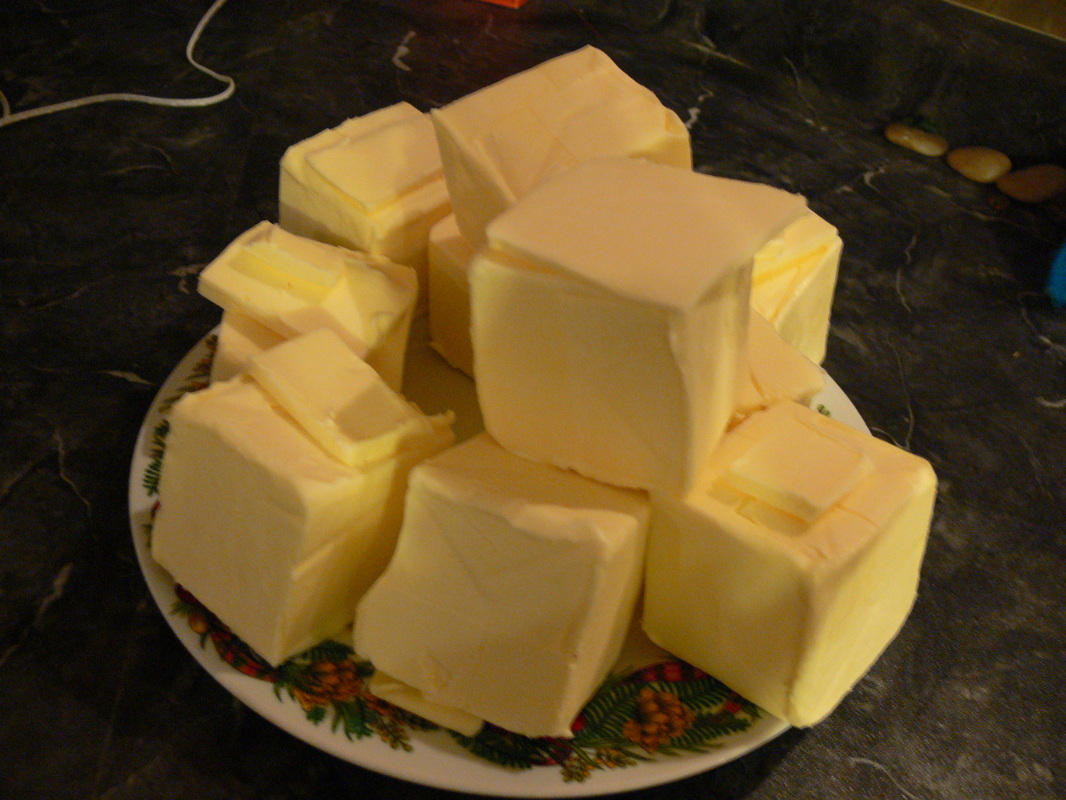
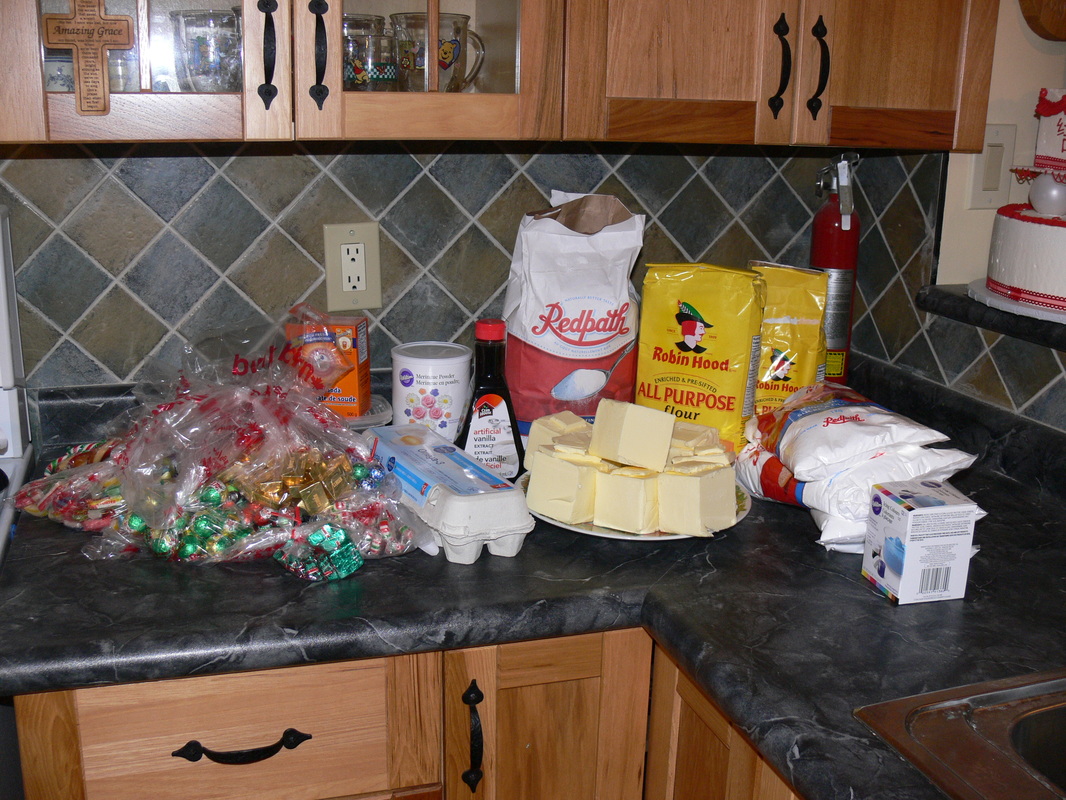
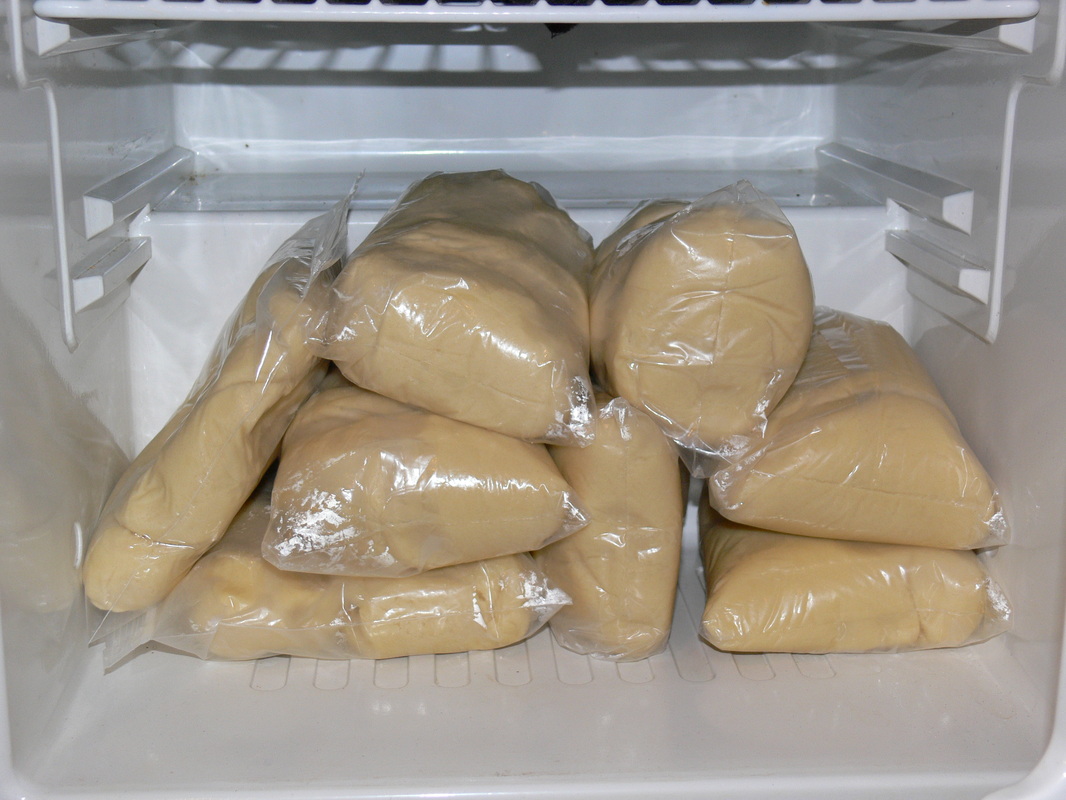
Not a healthy option...
2270g of butter. 2.5 kg of flour. 5kg of sugar. Piles and piles of wrapped candies. Just looking at the ingredients on the counter made my arteries clog up.
|
|
|
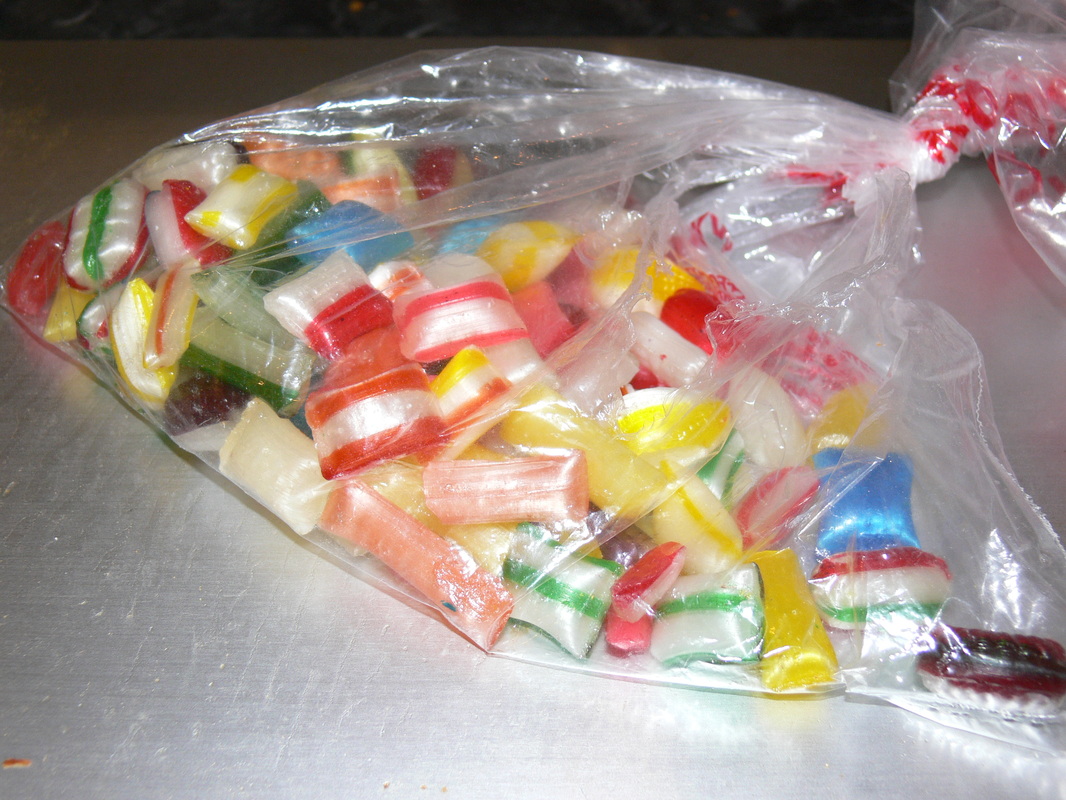
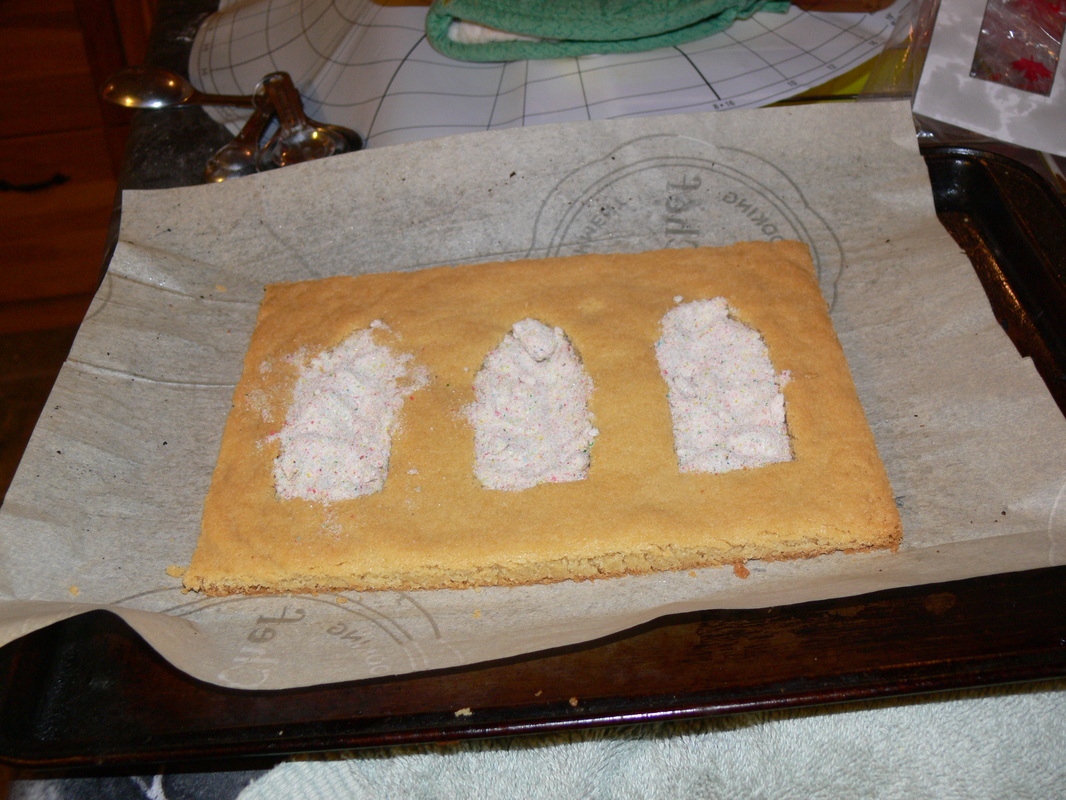
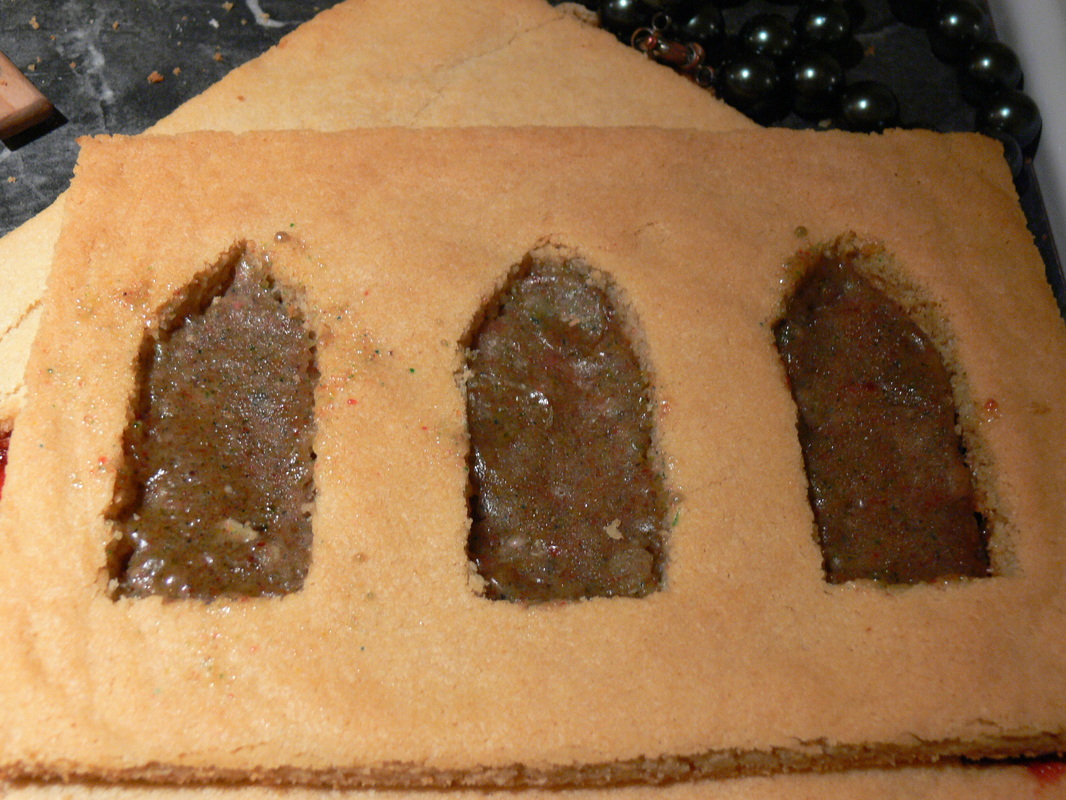
Disaster: Not all candies melt nicely...
I'm very quickly realising that it's actually easier to built very complex gingerbread houses overseas than in Canada! Overseas, I can pop into any of my local foreign-import shops and grab a tin of Foster's hard candies. They go through the blender well, they stay soft in a powder, and they melt into strong windows. But there are no Foster's in my local area and so I had to go searching for some hard candy equivalents. I found these typical Christmas hard candies in the Bulk Barn. I thought they'd be okay because they were predominantly white. When I ground them into a powder, it was a very pretty powder of white with colourful specs. Well, the first problem was that they hardened when in contact with oxygen. Unlike Foster's, this powder was rock hard and needed to be blended again. When I finally baked it, the windows turned black, and then faded to a very ugly pooh brown. Yes, there are still tints of colours, but the brown is awful, especially for a church! Also, the windows were all lumpy and horrible. I finally went into a candy shop in my town and picked up some red and white hard candies from some company in Truro. They melted beautifully, making really lovely, perfectly smooth window panes. Unfortunately, they are red, but oh well, what can you do? I'll just have to put some green around them and make them look more Christmas-y.
Lesson learned: Pre-melt your candies to make sure you get the result for which you are looking!
Lesson learned: Pre-melt your candies to make sure you get the result for which you are looking!
|
|
|
You must have the right tools!
Again, I'm surprised to discover that it is far easier to bake really complex gingerbread houses when I'm NOT in Canada. Why? Well, I don't have the ingredients I'm used to. Also, I don't have really good tools in Canada. So let's talk about the correct tools.
Having these tools will make the difference between, "That's a pretty good gingerbread house" and "OMG, how did you make that!"
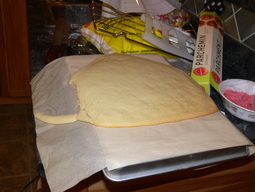
Large Baking Trays: Imagine my horror to learn my parents only had small baking trays! I went to Michael's, but still couldn't find big ones. I ended up baking my largest pieces on the underside of the trays. As you can see from the picture, the pieces fell off the tray after baking. Good thing those were expansion edges that could be cut off!
Off-Set Spatulas: These are multipurpose tools. On their side, they make perfect knifes for cutting out gingerbread pieces. Flip them over and you can use them to pick up your pieces for transferring to the cookie trays. Use them at 90 degree angles and you can cut out windows. Flip them again and they can be used to pull the dough out of the window frames. Next, use them to stir your royal icing when mixing colours, use them to scoop your icing into your icing bags, or use them to ice your house. In China, I have three off-set spatulas of varying sizes and have all three washed and lying beside me at all times.
Parchment: There's a difference between laziness and efficiency. So many websites tell you to flour your rolling pin to make sure the dough doesn't stick. Well, no matter how much I flour, the dough ALWAYS sticks. I use parchment. And reuse it. And reuse it. I keep one on the bottom and one on the top and roll the dough in between. On a very large piece of dough, I stick my hands on top of the parchment and quickly flip the pieces over when needed. I also use it on all my baking sheets. Now, please don't think I'm harming the environment; parchment paper in China is imported and thus very expensive, so I use it sparingly and I make sure I use and reuse it throughout the project.
Fondant Roller & Rolling Guides: So many websites tell you to roll out the dough to about 1/4inch (whatever that means... I think in centimetres...) So how can you make sure you have an even piece of dough when the typical pie rolling pin is far, far too short? Buy yourself a fondant roller (yes, it's very expensive). Then fit it with the silicone rolling guides. If the rolling guides you buy aren't big enough, then go looking through your house for something else suitable. When I'm in China, I use the green Shanghai pencils, taped together. In Canada, I used two Bic pens, which were a bit too big, but oh well, what could I do?
Having these tools will make the difference between, "That's a pretty good gingerbread house" and "OMG, how did you make that!"
Large Baking Trays: Imagine my horror to learn my parents only had small baking trays! I went to Michael's, but still couldn't find big ones. I ended up baking my largest pieces on the underside of the trays. As you can see from the picture, the pieces fell off the tray after baking. Good thing those were expansion edges that could be cut off!
Off-Set Spatulas: These are multipurpose tools. On their side, they make perfect knifes for cutting out gingerbread pieces. Flip them over and you can use them to pick up your pieces for transferring to the cookie trays. Use them at 90 degree angles and you can cut out windows. Flip them again and they can be used to pull the dough out of the window frames. Next, use them to stir your royal icing when mixing colours, use them to scoop your icing into your icing bags, or use them to ice your house. In China, I have three off-set spatulas of varying sizes and have all three washed and lying beside me at all times.
Parchment: There's a difference between laziness and efficiency. So many websites tell you to flour your rolling pin to make sure the dough doesn't stick. Well, no matter how much I flour, the dough ALWAYS sticks. I use parchment. And reuse it. And reuse it. I keep one on the bottom and one on the top and roll the dough in between. On a very large piece of dough, I stick my hands on top of the parchment and quickly flip the pieces over when needed. I also use it on all my baking sheets. Now, please don't think I'm harming the environment; parchment paper in China is imported and thus very expensive, so I use it sparingly and I make sure I use and reuse it throughout the project.
Fondant Roller & Rolling Guides: So many websites tell you to roll out the dough to about 1/4inch (whatever that means... I think in centimetres...) So how can you make sure you have an even piece of dough when the typical pie rolling pin is far, far too short? Buy yourself a fondant roller (yes, it's very expensive). Then fit it with the silicone rolling guides. If the rolling guides you buy aren't big enough, then go looking through your house for something else suitable. When I'm in China, I use the green Shanghai pencils, taped together. In Canada, I used two Bic pens, which were a bit too big, but oh well, what could I do?
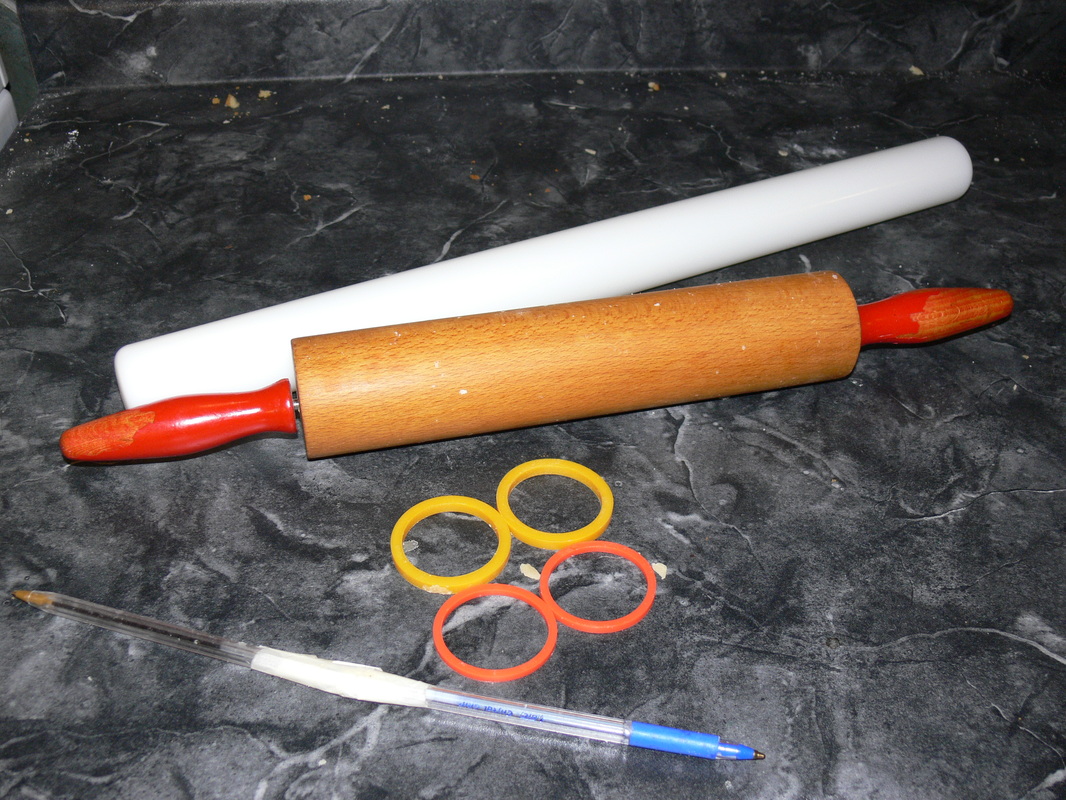
Look how tiny the traditional rolling pin is!
|
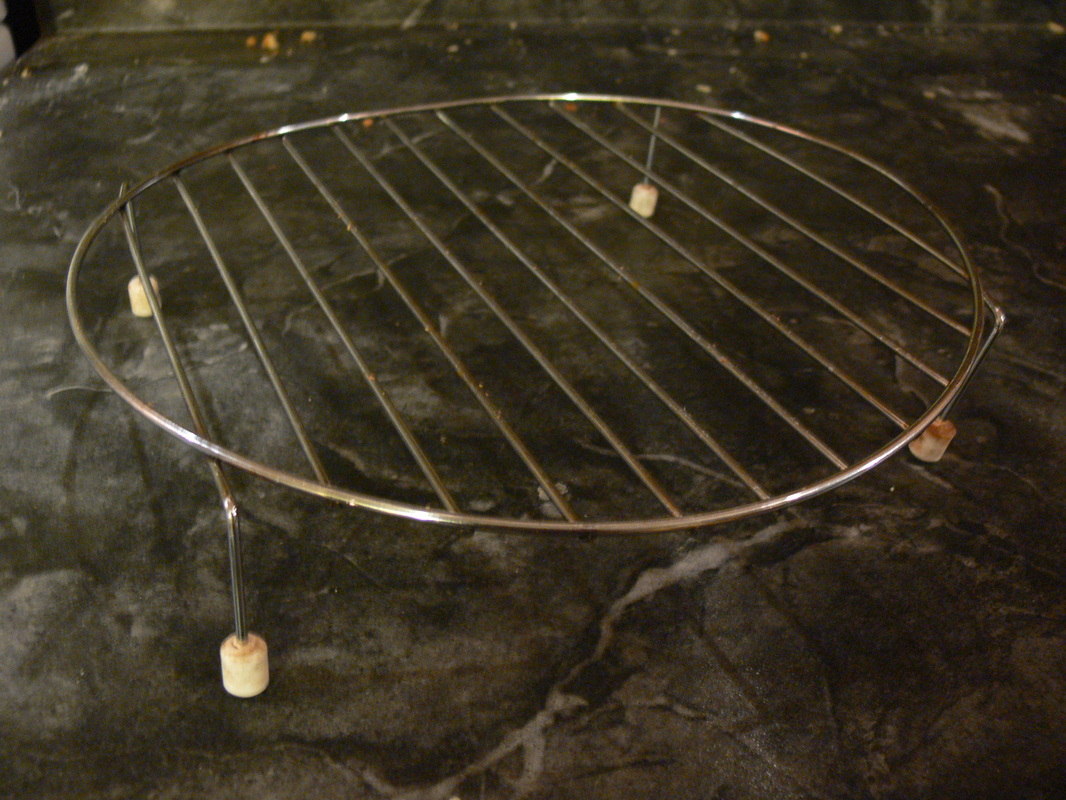
We've got one drying rack in Canada - it's small and very bendy, causing my pieces to warp!
|
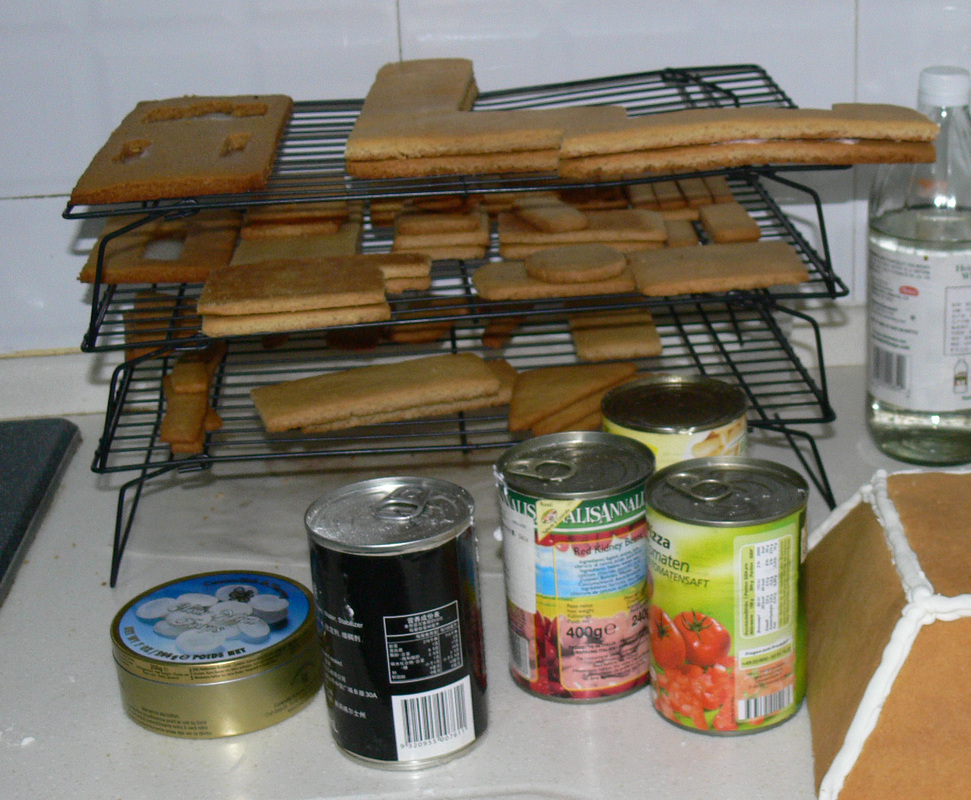
This is my super-deluxe drying rack in China. Stack-able and folds away for easy storage. Really nicely organises all gingerbread pieces.
|
Standing Mixer: My parents bought a Kitchen Aid standing mixer and I thought it was amazing! Then I went to China and bought some local brand for half the price. Double the size, twice as loud, and it makes the entire kitchen shake. But oh, is it ever amazing. It can take 4 whole batches of royal icing at once! That's 2+kg of icing sugar, 12 tablespoons of meringue powder, and 20 tablespoons of water. The bowl is huge! Then I keep the entire thing covered under a very wet tea-towel in the fridge. Love it. Missing it now.
Wet Tea-Towels: When I'm doing cake decorating, I try to keep everything around me very damp. This is because I need the icing to remain moist and fluid. Problems arise when things begin to harden. So I work quickly, with as little oxygen and with as much moisture as possible. This means that my fondant, gum paste, and left over dough go under wraps or in air-tight bags immediately. Not after a few minutes, but immediately. It also means that I have 5+ damp tea-towels going at any given time. They include:
1) Around the standing mixer bowl when icing is present;
2) Around any icing bag currently in use;
3) On top of any icing tips that I've used so far in the decorating session;
4) In the fridge, around any icing bags that I plan on using in the decorating session;
5) Ready to wipe-off a counter.
Cake Decorating Turn Table: I discovered this secret when doing my Gingerbread Train Set. When doing really intricate gingerbread houses, there's always little porches, turrets, or towers that need individual care. When they are on a turn table, you can keep your icing bag in one hand and be turning the decorative piece around as needed. Not a necessity, but oh, doesn't it make life that much easier?!
Structural Supports
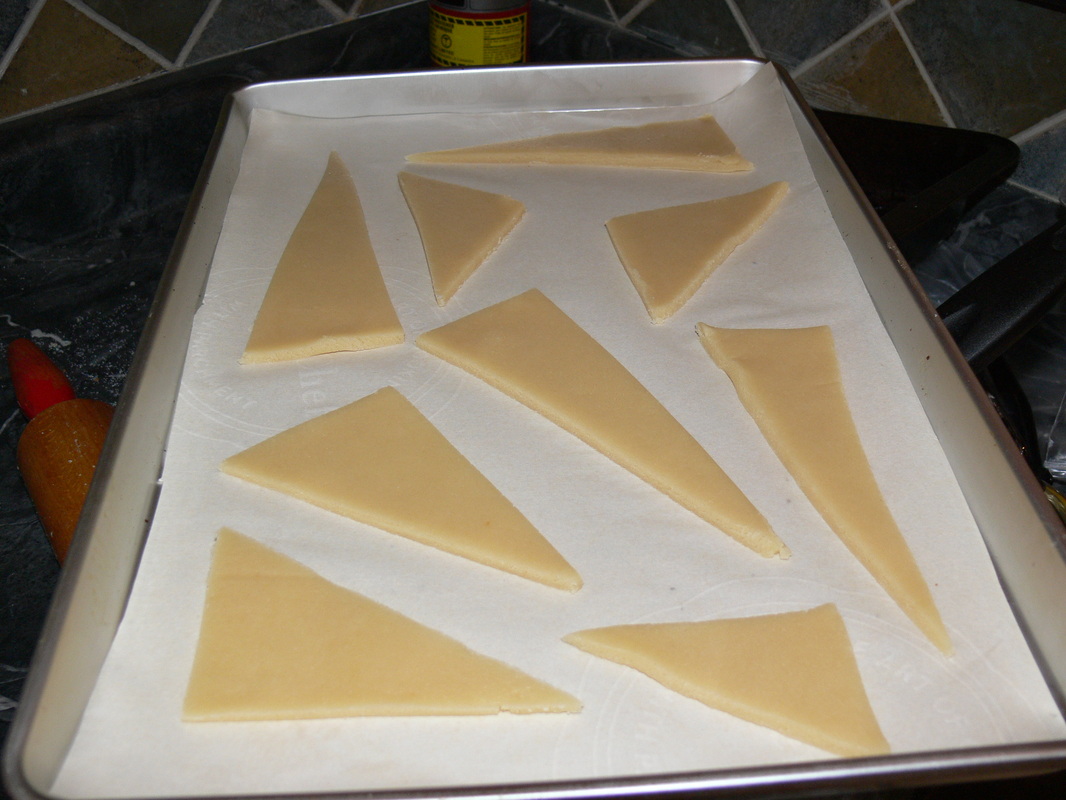
Nothing fancy here - I just cut out right angle triangles for supports.
|
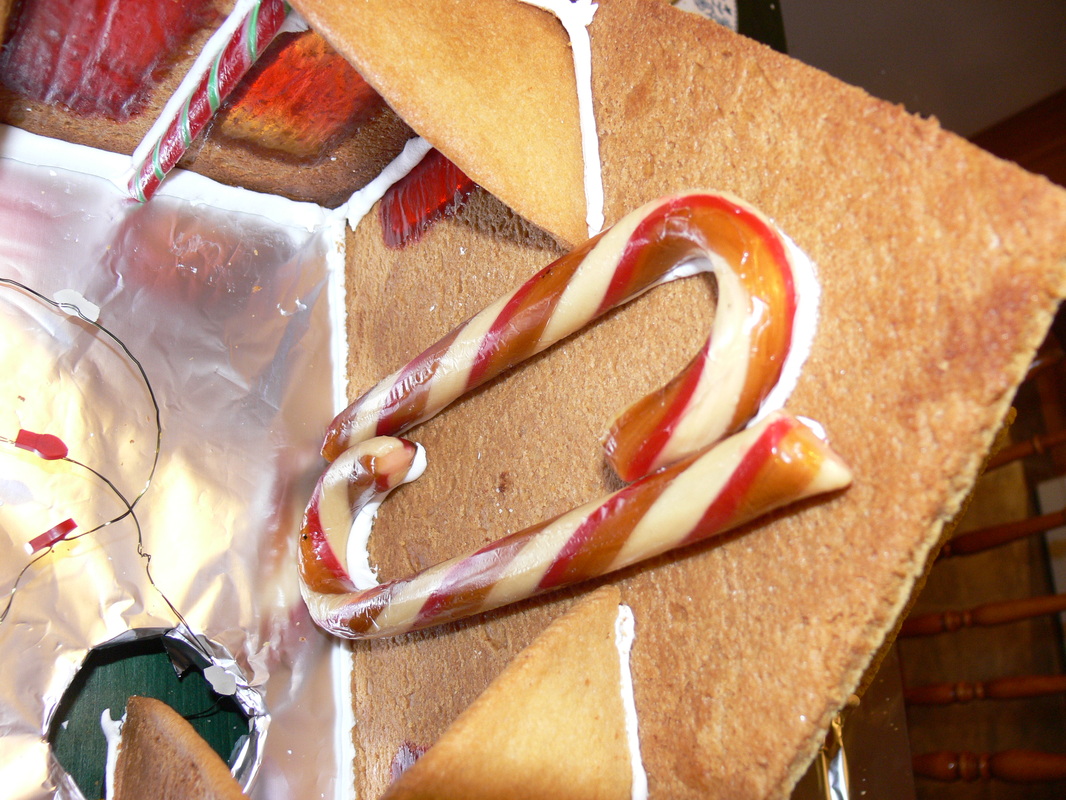
The roof will rest on the tall panels, so I re-enforced them with extra large candy canes.
|

Small triangles to connect the sides; large triangles to stabilise the walls to the floor.
|
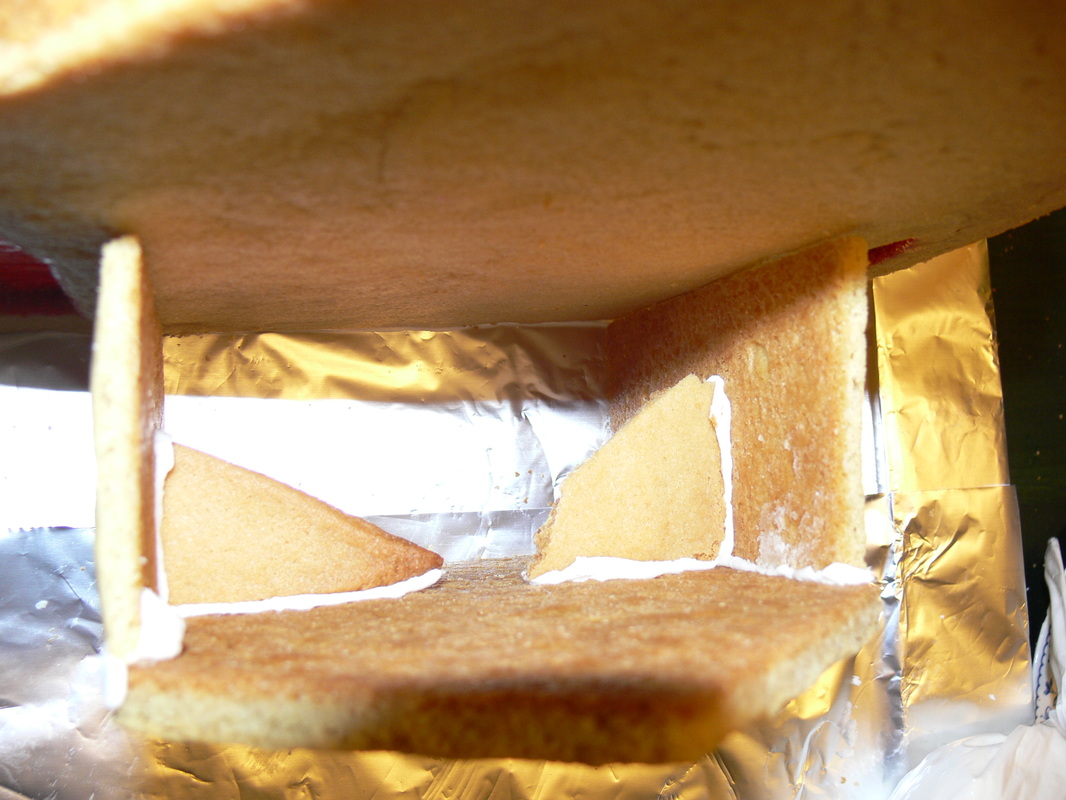
These supports were really only used to ensure that the porch had two 90 degree angles.
|
Lighting

My dad built a platform using a cupboard door, two planks of wood, and a drill press. The lights were feed up through the bottom hole.
|

Normally my lights hang so I don't have to worry about coverage. This pattern is single storey, so I had to glue the light up high to ensure that the top window got light as well.
|
|
Now that I know that $0.20 lights catch the gingerbread house on fire, I like to go with more expensive lights. I think these were $10 or so from Walmart. They have three settings (please watch the video) that include: on, blinking, and pulsing. My favourite was pulsing, so that's what I'm going to use when I first show the light to my friend and her kids.
Grease Warning! Grease Warning! Grease Warning! Grease Warning!
Grease will degrade your royal icing, so don't allow your royal icing to come into contact with grease. When I was at Wilton, we discovered this when someone accidentally mixed the colouring pastes. Grease-based colouring pastes are used for isomalts and pulled sugar; non-grease based colouring pastes are used for royal icing. If you accidentally put the wrong kind in, your isomalt or icing will break down.
This candy church has wrapped candies. My niece decided to unwrap the candies because they were prettier that way and stuck them up. The next day, they started to fall off. I continuously pipped them back on until I stopped and took a careful look. Only certain hard candies were falling off and the icing underneath was a bit funny-looking. Then I realised -- The candies that were falling off were all greasy in texture and the royal icing underneath was oily and sticky.
Next year's options - Either leave the candies in their wrappers or don't use greasy candies on the house.
Fun with leftovers
|

|

|
I thought my first candy house was too plain. It only had three colours - a weird green, a pink and white. Since then, I've made a batch of icing that is only for colouring. I immediately section-out the colours into different tubs, which I store in the fridge. From those, I put a bit in piping bags that I keep under a wet cloth in the kitchen. In this way, I can always grab a bit of colour whenever needed, and my baking doesn't look so plain. At the end, though I have a lot of left over colours.
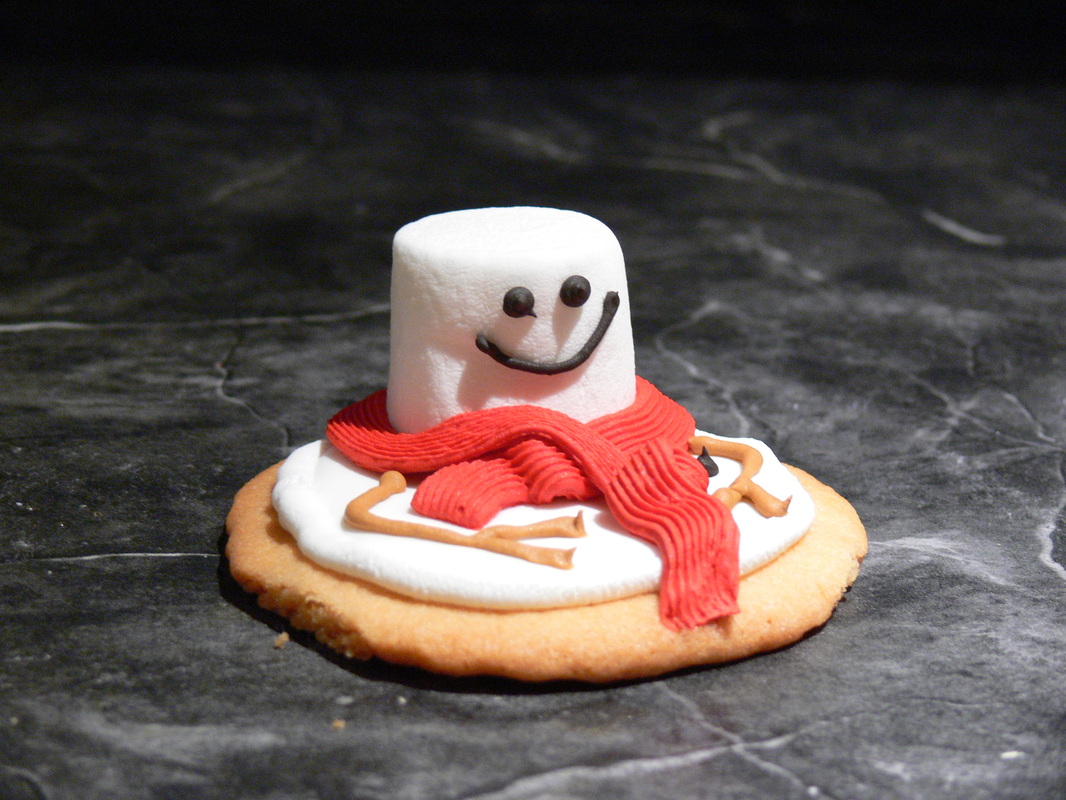
I've made this Climate Change Snowmen. I initially called them Stephen Harper Snowmen since they are obviously in denial about climate change and don't seem to be doing anything about it. Then my mum got huffy and my dad started going on about China's role in climate change. Alright, already!
I had the red, green, and blue leftover from the gingerbread house. My yellow became brown. When I was done, my red became black. Now to try and figure out how to transport these to the family Christmas party...